Introduction
In this section you will find guides to help you get started with Axioroute SDK and Map Webview. For all guides there will be some common requirements and basic setup that are all listed here.
Requirements
- Get an API key -> see with Axioroute
- Setup an Auth Server
Setup your app environment
For the purpose of this guide we will use Vite, but your can use your favorite builder instead
#we use pnpm but you can also use npm or yarn
pnpm add -D vite
Then we add Axioroute Package
pnpm add @axioroute-sinari/axioroute-sdk @axioroute-sinari/axioroute-mapviz
Setup your entry files
Create an html file at index.html with the following content
<!DOCTYPE html>
<html lang="en">
  <head>
    <meta charset="UTF-8" />
    <meta name="viewport" content="width=device-width, initial-scale=1.0" />
    <title>Axioroute - Get Started</title>
  </head>
  <body>
    <iframe
      id="webview"
      src="http://localhost:5174?author=myapp-webview"
      width="100%"
      height="500"
      scrolling="no"
    ></iframe>
    <script type="module" src="/src/index.js"></script>
  </body>
</html>
It's just an empty page with our Map Webview as an iframe
Then create our javascript entry point at src/index.js
/**
 * We import the Class we will need to get our app running
 */
import {
  ARMessage,
  ARRequestClient,
  MPTJobTools,
  MCIJobTools,
  Activity,
  State,
  Operation,
} from "@axioroute-sinari/axioroute-sdk";

import {
  Features,
  VActivities,
  VOperations,
  VItineraries,
} from "@axioroute-sinari/axioroute-mapviz";

/**
 * We set the Axioroute API base url, the auth url (see pre-requisites) and the api key (see pre-requisites).
 */
ARRequestClient.setApiBaseUrl("<AXIOROUTE_API_URL>");
ARRequestClient.setAuthUrl("<YOUR_AUTH_URL>");
ARRequestClient.setApiKey("<YOUR_API_KEY>");

/**
 * We set the author of the messages sent from this App.
 * It will be used to identify the sender of the message on the receiving side.
 */
ARMessage.setAuthor("myapp");

/**
 * We tell our app that we will communicate with the iframe with id "webview"
 */
ARMessage.setDefaultTarget({
  targetWindow: document.getElementById("webview").contentWindow,
});
Start your local HTTP Server
Add the following line in your package.json file
{
  //...
  "scripts": {
    "start": "vite"
  }
}
and run
pnpm start
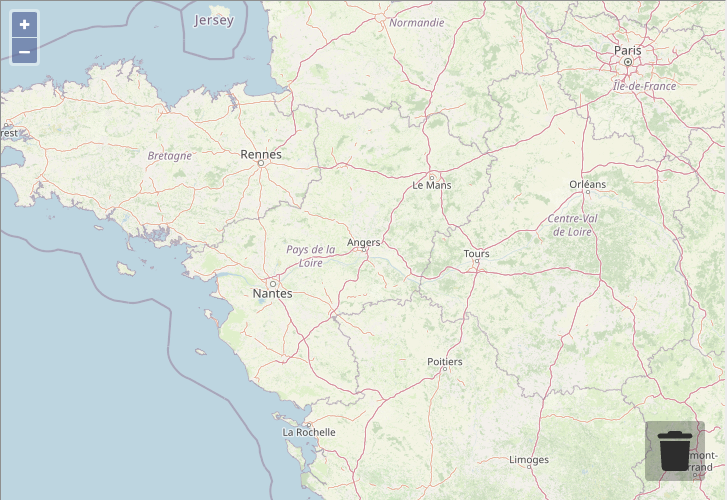
You should see at http://127.0.0.1:5173 the following view:
Authenticate to Axioroute API
add the end of src/index.js add:
/**
 * We get the API Client instance and authenticate with our credentials
 */

const apiClient = ARRequestClient.instance();
await apiClient.auth("<USERNAME>", "<PASSWORD>");
Remember to never leave your username/password in any file when you'll have finished your onboarding.
They should always been pass through user form.
Go on with the guides
In the next pages you will find guides to help you get started with Axioroute SDK and Map Webview.
They will use the files you've just created unless specified otherwise.
Now just pick the guide you want to follow or click on next page.